Hello everyone! Welcome back to my blog!
This time I decided to try my hand at sewing wearable clothes! I found a pattern for a peplum top at my local craft store and thought it was super cute. I've sewed some things in the past, but never wearable clothing, so I figured now was as good of a time as any. Follow along to see the process!
Disclosure: I attempted this peplum top a few months ago, without much success. You'll see more about that later.
Note: I used 5/8" seam allowance throughout the entirety of this project.
Step 1
Choosing the pattern! Like I said, I chose to make a peplum top. This is McCall's Pattern M7958. It has 4 total patterns available in the package. I chose to do design D, the one featured on the lower left corner.
 |
| The pattern! |
Step 2
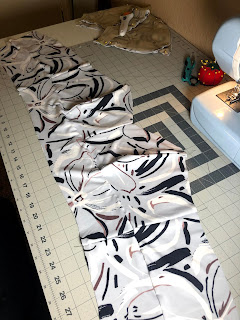
Next, I cut out the appropriate pattern pieces for my top. Because there are different styles included in the package, not all of the pattern pieces are necessary. Once I cut out the pattern pieces, I pinned them to my fabric of choice (a woven knit) and cut out the pieces. I made sure to transfer any notches from the patterns onto the pieces by using my fabric scissors to create small cuts in the fabric. This helps me line up the fabric pieces later when I need to sew them together.
 |
| Cut the pattern pieces! |
 |
| Pin the pieces to the fabric! |
 |
| Cut out the pieces! |
Step 3
First, I reinforced the fabric between the notches with a basic staystitch. I then lined up the notches on the cups, pinned the pieces together, and stitched them using a straight stitch. I repeated this for both cup pieces of the top. I made sure to place the right sides (the patterned sides) together, so that when I sewed, the stitches aren't visible in the final project.
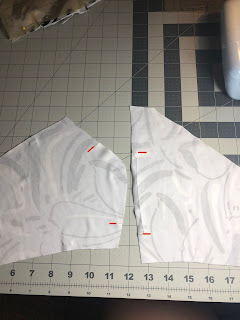 |
| Lining up the notches! |
 |
| Pinning the right sides of the fabric together! |
 |
| Stitching the pieces together, for both cups! |
Step 4
The next part was really simple! I flipped the cups upside-down, lined up the notches, and stitched them together, to create the front part of the top. Again, I made sure to place the right sides together to hide the stitching. I ended up stitching it twice, as the top was a little bit too wide for me the first time.
 |
| Lining up the notches to stitch! |
 |
| All stitched together! |
Step 5
The next step was to stitch the side bands to the front of the top. Once that was completed, I sewed the midriff band pieces together, since there were only three pieces in total and it was a very simple stitch. You can see how the two completed pieces look when they're lined up together.
 |
| Lining up notches for side bands! |
 |
| Side bands stitched to the front piece! |
 |
| Stitched together the midriff, and aligned with top! |
Step 6
Next, I pinned those two pieces together and sewed the midriff to the top piece. It was important here to line up not only the notches but the seams as well! I also made sure to stitch the seams open.
 |
| Pinning the pieces together! |
 |
| (Almost) Completed top! |
 |
| Making sure to line up the seams! |
Step 7
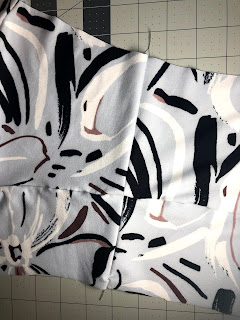
This pattern called for a separating zipper, but since my fabric was fairly stretchy, I chose to simply stitch the back pieces together. They were a little bit too long for my midriff, so I pinned and marked where I wanted to sew, stitched the pieces together, and cut off the excess.'
 |
| Pins and fabric chalk marked where I wanted to cut! |
After I stitched the bands together, I tried on the top to see how it fit. It fit very well! I then went over my straight stitches with a zigzag stitch to reinforce the stitches.
This is where I'm ending this post, since that is all I've completed of the top thus far! Once I sew some more, I'll post a progress update with more detail. Thanks for following along!
If you have any tips, please feel free to leave them in the comments! Like I said, this is pretty much my first time making wearable clothing, so I am definitely open to learning and hearing from others!
Have a fantastic day!


Comments
Post a Comment